- Product Types
- Prices Types
- Adding Products
- One Time Pricing
- Subscription Pricing
- Subscription Trials Setup
- Installment Pricing
- Donation / Pay What You Want
- Inventory Management
- Product Variants
- Variant Images
- Digital Downloads
- Change Product Availability
- Product Collections
- First-Time Payment Discounts
- Manage Product Access
- Create Product With Free Trials
- Charge Set Up Fee on Trials
- Product List
- Product Pages
- Product Content
- Custom Buy Links
- Product SEO
- Change Permalinks
- Custom Fields
- Related Products
- Price Boost
- Test Mode/Payments
- Edit & Customize Form
- Change Form Template
- Delete SureCart Forms
- Add Checkout Form
- Checkout Form With Gutenberg
- Checkout Form in Elementor
- Custom Thank You Page
- Create Donation Form
- Customize Confirmation Popup
- Include Coupons in URLs
- Pre-Fill Checkout Fields
- Change Checkout Texts
- Password Field in Checkout
- Default Country Code
- Add Terms to Checkout
- Conditional Block Checkouts
- Remove Coupon Field
- Hide Quantity Option
- Disable Quantity Editing
- Disable Item Removal
- Country Specific Purchases
- Update Store Details
- Dark Mode
- Orders & Receipts
- Manage Slide-out Cart
- Customers Section Overview
- Create Customer
- Delete Customer
- Update Customer Details
- Edit Invoice Details
- Create Shipping Profiles
- Manage Shipping
- Disable Payment Processor
- Manage Store Notifications
- Manage PayPal Branding
- Transfer Store
- How to Download SureCart Purchase Invoice
- Vault – Redeem & Manage Your SureCart Pro Plan
- Enhance Performance Settings
- Invite Team Members
- Enable Spam Protection
- Sync WP Users
- User Roles & Permissions
- Export Data
- Clear Test Data
- Manage Email Notifications
- Remove User Roles
- Remove Plugin Data
- Delete Store
- Delete Business & User Account
- Guest checkout
- Switching Store Currency
- Fix View Order Button
- Fix Express Payment Buttons
- How To Stop Sending WooCommerce Notifications via SureCart?
- Fix PayPal Test Connection
- Fix Sign-In Loop
- Fix Order Confirmation Redirect
- Fix Divi Bullet Point Issue
- Fix Customer Dashboard
- Fix JSON Response Error
- Failed Payment Behavior
- Fix Stripe Zip Code Error
- Fix "Product Can’t Be Blank"
- Troubleshooting Guide
- PayPal IPN Warning Emails
- Caching Configuration for SureCart
- Why iDEAL Might Not Appear in Your Checkout
- Compatibility Guide
- Fix – SureCart store disconnected
- Configuring LiteSpeed Cache for SureCart
How to Connect Razorpay Payment Processor
This document explains how to connect Razorpay with SureCart so you can start accepting payments from your customers.
Razorpay is a popular payment processor in India that supports payments via cards, net banking, wallets, and UPI. SureCart connects to Razorpay using a secure authorization flow, so no manual API keys or webhook configuration is required.
Important — Business Website URL required for Live Payments
To process Live payments with Razorpay, Razorpay requires merchants to add and verify their Business Website URL in the Razorpay dashboard.
If this URL is missing or does not match the website where the checkout is hosted, Razorpay will block Live payments, even if the processor is connected successfully in SureCart.
Important — OAuth connection requirement
Due to a current limitation in Razorpay’s OAuth flow, the connection works only if you are already logged into your Razorpay account in the same browser before connecting it to SureCart.
If you are redirected to Razorpay to log in during the connection flow, the redirect back to SureCart may fail. This behavior is currently under investigation by the Razorpay team.
Workaround: Log in to your Razorpay account first, then return to SureCart and connect Razorpay using the same browser.
Important — Subscriptions with Razorpay
To sell subscription products using Razorpay, Razorpay requires your account to have Recurring Payments (Subscriptions) enabled.
This feature is enabled by Razorpay, may require a manual request to Razorpay Support, and is not controlled by SureCart.
If this feature is not enabled, Razorpay may reject subscription payments, even if the processor is connected successfully.
Learn how Razorpay recurring payments work:
https://razorpay.com/docs/payments/recurring-payments/
Requirements
Before getting started, make sure you have:
- WordPress admin access
- SureCart installed and activated
- At least one published product
- An active Razorpay account
- Access to SureCart → Settings → Payment Processors
If you plan to sell subscription products:
- Recurring Payments (Subscriptions) enabled in your Razorpay account
How the Razorpay Connection Works
SureCart connects to Razorpay using an authorization-based connection.
During setup:
- You choose whether to connect in Test Mode or Live Mode
- You are redirected to Razorpay to authenticate
- You authorize SureCart to access your Razorpay account
- Once authorized, the processor is automatically enabled in SureCart
No API keys or webhook setup is required.
How to Connect Razorpay in Test Mode
Follow these steps to connect Razorpay in Test Mode:
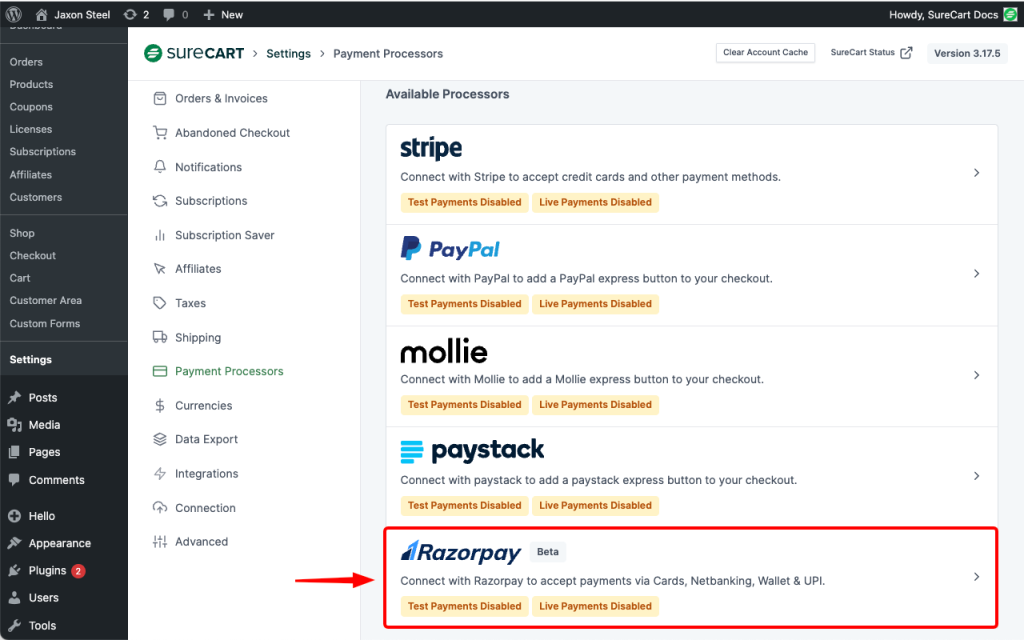
- Go to your WordPress dashboard.
- Navigate to SureCart → Settings → Payment Processors.
- Locate Razorpay in the list of available processors and click it.
This will open the Razorpay processor page inside app.surecart.com.
Step 1: Start the Connection
Note: Make sure you are already logged into your Razorpay account in the same browser before clicking Connect. Otherwise, the authorization flow may fail after login.
- Click the Connect button.
- From the dropdown, select Test Mode.

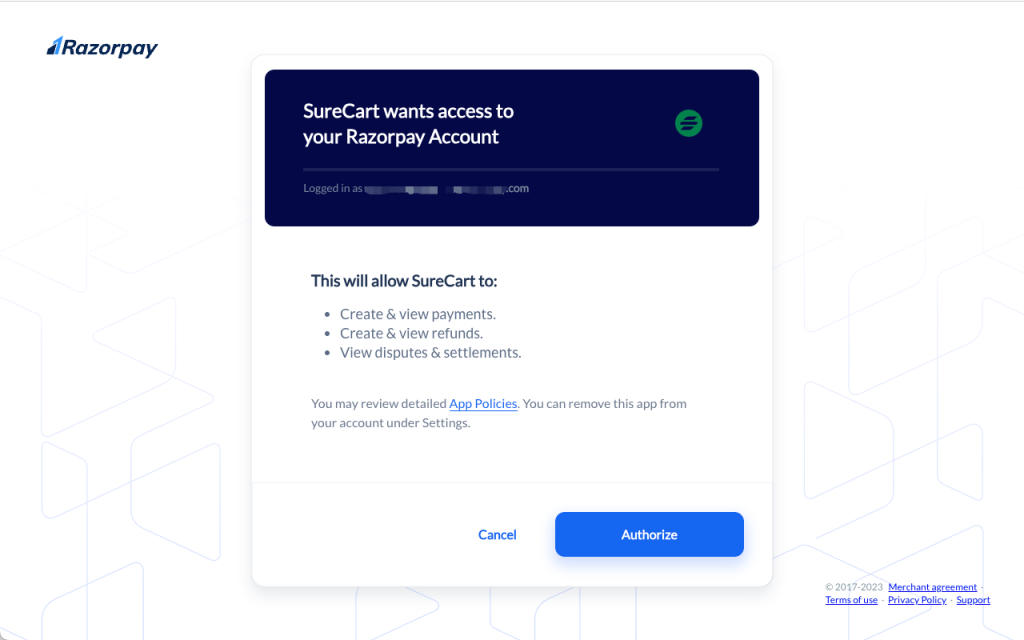
Step 2: Authorize the Connection in Razorpay
- You will be redirected to Razorpay.
- Log in to your Razorpay account if prompted.
- Review the permissions requested by SureCart.
- Click Authorize to approve the connection.
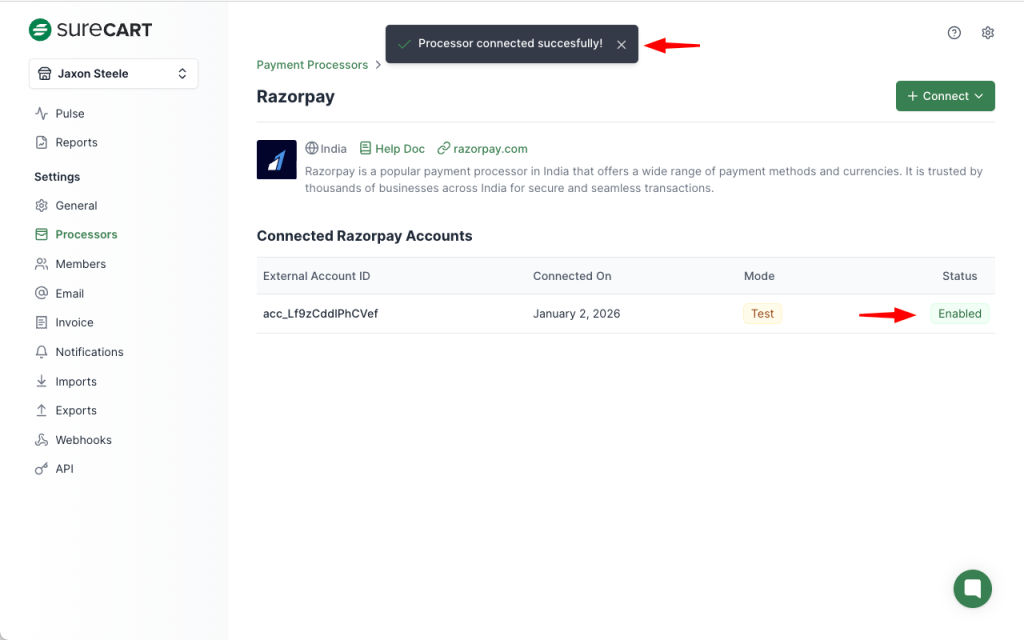
Step 3: Confirm the Connection
After authorization:
- You will be redirected back to app.surecart.com
- A success message will confirm the connection
- The Razorpay account status will show as Enabled
- The connection mode will be marked as Test
At this point, Razorpay is ready to be used for test transactions.
How to Connect Razorpay in Live Mode
Once you have verified everything in Test Mode, you can connect Razorpay in Live Mode.
Before testing Live payments
Make sure your Business Website URL is added and approved in your Razorpay account. Otherwise, Live payments may be blocked.
The process is the same, with one important difference: you must select Live Mode.
- Go to SureCart → Settings → Payment Processors → Razorpay
- Click Connect
- Select Live Mode
- Log in to Razorpay (if required)
- Click Authorize
After authorization, you’ll be redirected back to SureCart, and the Razorpay account will appear as Enabled in Live Mode.
Business Website URL Requirement for Live Payments
To process Live payments with Razorpay, merchants must configure a Business Website URL in their Razorpay account.
This URL must match the domain where the payment request is made.
What happens if this is not configured
If the Business Website URL is missing or does not match the checkout domain, Razorpay will block Live payments with the following error:
Payment blocked as website does not match registered website(s).
Important notes
- This requirement applies only to Live mode
- Test Mode payments are not affected
- After adding the website URL, Razorpay may require approval, which is usually completed automatically after some time
How to add your Business Website URL in Razorpay
Follow Razorpay’s official documentation to add or update your website URL:
https://razorpay.com/docs/payments/dashboard/account-settings/business-website-details/
Notes, Limitations, and Edge Cases
- Razorpay requires the checkout currency to be supported. Currently, Razorpay requires Indian Rupee (INR). If another currency is used, Razorpay will not appear as a payment option at checkout.
- Razorpay availability depends on the customer’s billing country. The checkout must allow India or other Razorpay-supported countries.
- Razorpay requires a customer phone number to process payments. When Razorpay is enabled, SureCart automatically adds a Phone field to the checkout form. No manual checkout form changes are required.
- Subscription payments require Recurring Payments to be enabled in the Razorpay account.
- Depending on the account, this feature may already be available or require a manual request to Razorpay Support.
- If not enabled, subscription checkouts may fail even if Razorpay is connected successfully.
- Currently, the Razorpay OAuth connection requires the merchant to be logged into Razorpay in the same browser before connecting it to SureCart.
If the merchant logs in during the OAuth flow, the redirect back to SureCart may fail. This issue is being investigated by the Razorpay team.
- Test Mode and Live Mode must be connected separately. Connecting one does not automatically enable the other.
Expected Outcome
After completing the steps in this document:
- Razorpay will be successfully connected to SureCart using a secure authorization flow.
- The Razorpay processor will appear as Enabled in SureCart.
- The active connection mode (Test or Live) will be clearly displayed.
- Razorpay will be available as a payment option at checkout when:
- The correct mode is connected
- The checkout currency is supported (INR)
- The customer’s billing country is supported
- Required checkout fields (such as phone number) are completed
FAQs
We don't respond to the article feedback, we use it to improve our support content.